Valuekeep provides users with a set of lists that can be changed according to their needs.
How to create a new list?
Users can create new lists at any moment by copying a list that comes standard with the product.
Only lists created by users can be edited.
To edit a list, follow these steps:
- Open the list you wish to edit;
- Configure one or more of the following list values:
- Columns available on the list;
- Filters;
- Parameters;
- Conditional formatting;
- Groups;
- Aggregations;
- Save the list by using the save option in the button bar.
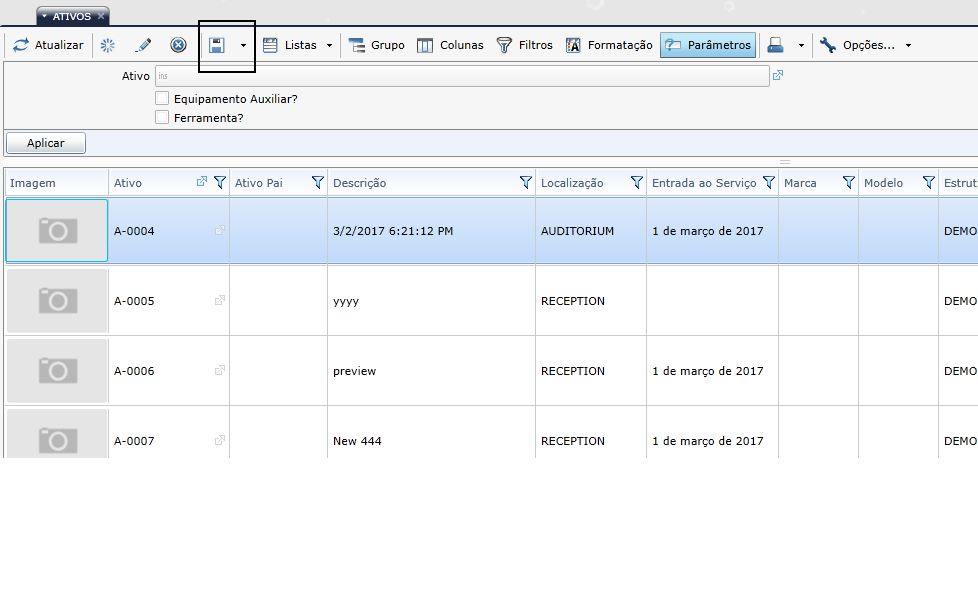
How to build a filter with a list?
When you set filters for a list, you can create views of that list to fulfill a specific goal. For example, if we create a condition to filter a customer orders list by customer, we allow the user to quickly find orders from a specific customer.
Follow these steps:
-
Open the list with which you wish to associate the filter;
- In the button bar, choose the “Filters” option. This option displays or hides the area where filters are specified, under the button bar;
- The selector displayed by default in the filters area when there are no conditions is an aggregator that allows you to specify how the different conditions are associated:
- The first option means that the filter only applies when all conditions are true;
- The second option means that the filter only applies when at least one of the conditions is true;
- The third option means that the filter only applies when one of the conditions is true;
- Repeat the following steps for each condition:
- Click the ‘+‘ button to add a new condition;
- Use the first selector to select the column to which the filters applies;
- Use the second selector to select the logical operations that defines the condition;
- Use the third selector to select the source of the value that defines the start of the condition: Entered when the filter is specified; Parameter prompted of the user; System variable (ex: Name of the user logged in);
- Specify the value used in the condition;
- Apply the filter to view the results;
- Save if you wish the filter to be specified in the list.
How to create a summary list with aggregated values based on a source list?
To provide support for business requirements, you can create a summary list from a source list. For example, we can create a new list from a list of purchase invoices, using the monthly totals from those invoices.
This type of lists is built by using ‘Aggregations‘.
To define an aggregation, the user must choose the columns he wishes to join. Columns available for aggregation are those that can be a parameter of an arithmetic function (such as: Sum) or time aggregation function. This means you can choose the following types of columns: Number, Decimal, Money value, Date, Date/time.
Follow these steps:
- Open the list over which you intend to perform the aggregation;
- Use the “Columns” button on the button bar to display the column chooser;
- Choose the “Aggregations” tab at the top of the column chooser;
- Expand the table(s);
- Associate an aggregation function with the columns on which the aggregation will be performed;
- Apply the aggregation;
- Save the list.
In a list with columns A, B, C and D, if we perform an aggregation using the ‘Sum’ of C and ‘Month’ of D, we get a number of records equal to all possible value combinations of columns A and B.
For each combination of values between A and B, we will get the corresponding aggregated values of C and D.
How can I add or remove columns from a list?
Selecting the columns from a given list is done by using the column chooser inside the list you wish to edit. To add or remove columns, follow these steps:
- Open the list;
- In the button bar, choose the “Columns” option. This will display the column chooser on the left side of the editor, using the full height of the screen;
- The columns displayed are grouped up by table. To view the columns of each table, users must click on the title of each table;
- The list columns displayed are those enabled with a checkmark in the column chooser;
- To add or remove columns from the list simply select or unselect them using the visual element displayed in the right side of the column’s name.
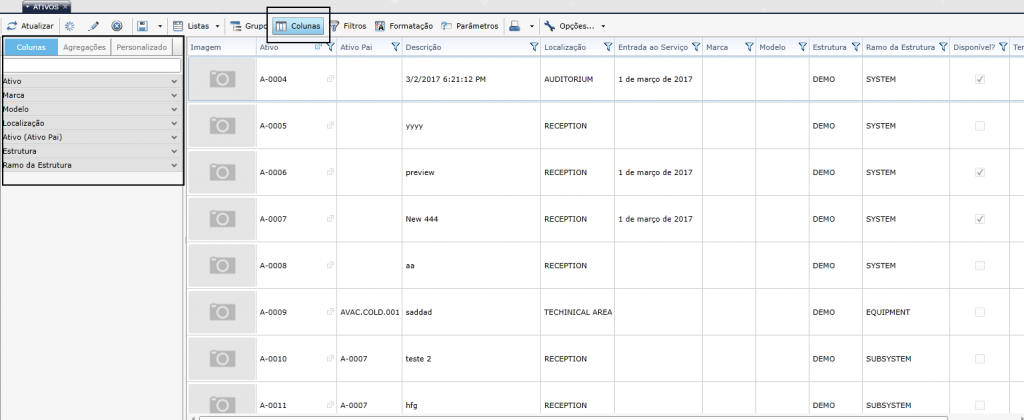
The option that marks columns associated with other tables are signalled with a checkmark. When you select these columns, users will see an additional table in the column chooser. This table is the one referenced by the current column.
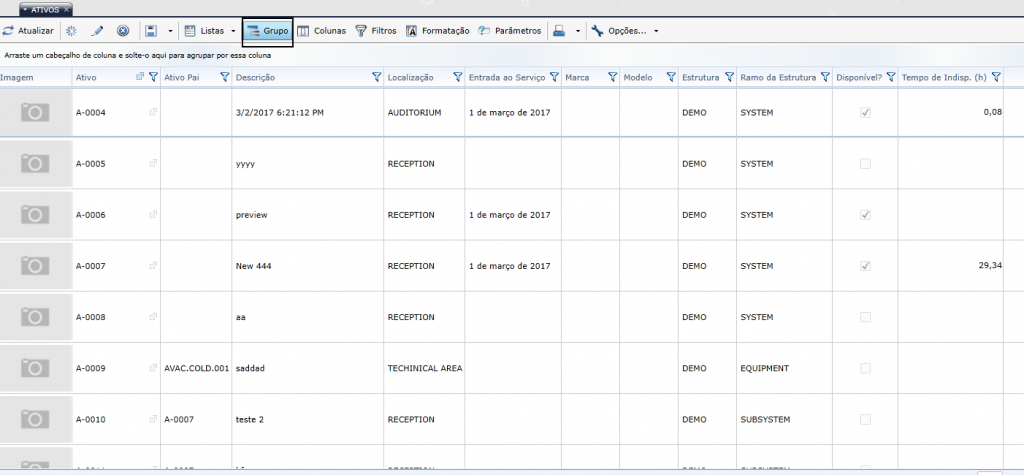
How can I group a list according to one or more columns?
When the list is grouped up using one or more columns, the user views a single line for each group. By expanding that group, groups from the following level are shown, or if there is no following group level, the records are displayed. Follow these steps:
- In the button bar, choose the ‘Group‘ option. The group panel is displayed at the top of the screen under the button bar;
- Repeat these steps for each column you wish to group up:
Click and drag the title of the column by which you wish to group to the group panel; - Save the list using the ‘Save‘ option in the button bar.
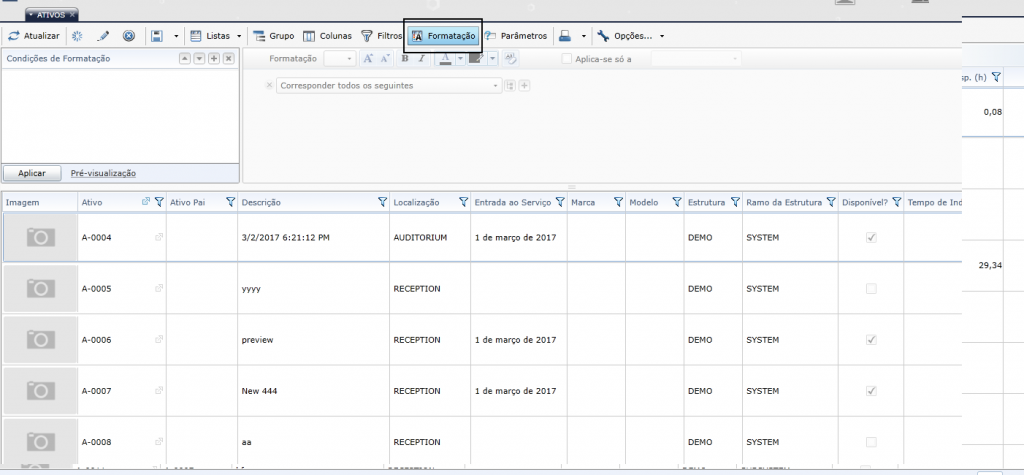
How can I format values in a list according to a specific condition?
In some scenarios, it may be useful to draw attention to specific values in a list whenever a certain condition is met.
This behavior is known as conditional formatting. To use it, you must:
- Open the list to which you wish to add conditional formatting;
- Click the ‘Formatting’ option in the list’s button bar. This will display a panel at the top of the list where you can define the formatting conditions;
- Repeat the following steps for each desired condition:
- Under formatting conditions, click the ‘+‘ option in the upper right corner;
- Change the name of the condition added to the conditions list;
- In the filters and formatting area, select the formatting (for example: the font) and the filters that must be used for that formatting to be applied;
- If you wish to create a preview, click the preview option under the list of conditions;
- Choose the ‘Apply‘ option;
- Save the list.